|
|
Introduction
Following is an overview of PVD's menu commands. Many are discussed more fully later in the context in which they are used, beginning with topics such as *Adding Movies.  | | Throughout this documentation, commands will be referred to as Menu>Command or simply Command. Many may be placed on the toolbar and/or assigned to hotkeys at Preferences>Appearance. Since both toolbar buttons and hotkeys are user-configurable, they will not be used to identify commands in this help documentation. | |
File Menu
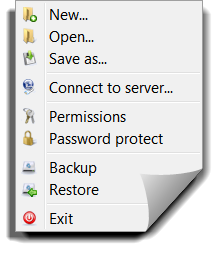
  | - New, Open and Save as invoke the standard Windows file dialog for these operations. Most users will work with one database that is opened automatically on start-up, and will not use these file commands regularly.
- Connect to server is discussed in Server Mode (instruction 4).
- Users of a particular database may be defined, and assigned passwords and Permissions for read, write and configuration access. Password protect is for assigning a general password that will be required for anyone to open the database. This is not an encryption system and therefore insecure. You will be annoyed, however, if you forget your passwords.

- Backup will compress the database and save it with a .BAK extension. Use Restore to recover these files. These commands are provided for your convenience. Other forms of backup (even just making a copy of the database) are somewhat more reliable—because they don't depend on the program for these functions. Effective backup needs to protect the data from a malfunctioning program as well as other risks.
| |
Movies
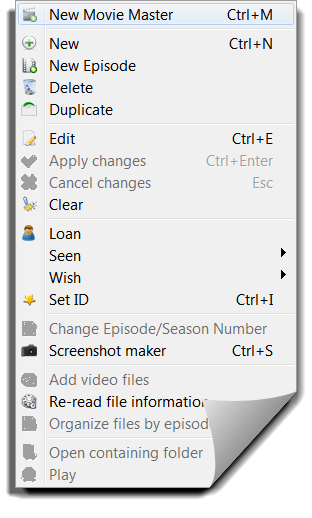
  | - New Movie Master and New are alternative methods for *Adding movies. New Episode is a special case of New for attaching the new record to a particular season of a series. If used on an existing movie, it effectively turns that movie into a series. Or to put that another way, a series is a movie with episodes attached to it.
 Note the separate command for Change episode/season number. Note the separate command for Change episode/season number.
- Delete is a somewhat different from what you might expect. Because the record may still be used elsewhere, it will not actually be deleted. Unnecessary information will be stripped from it, and it will be made invisible. To delete an item permanently, press Ctrl while selecting Delete or pressing the Delete key on your keyboard.
- Duplicate makes an exact duplicate of an existing record—so that record may be used as a template for adding a new movie.
- Edit puts the record in Edit Mode for editing fields in the Information Panel. Apply/Cancel changes accepts/discards whatever changes have been made.
- When multiple items in the List are selected and then the Edit command is invoked, the Multiple Movie Editor ("MME") dialog appears:
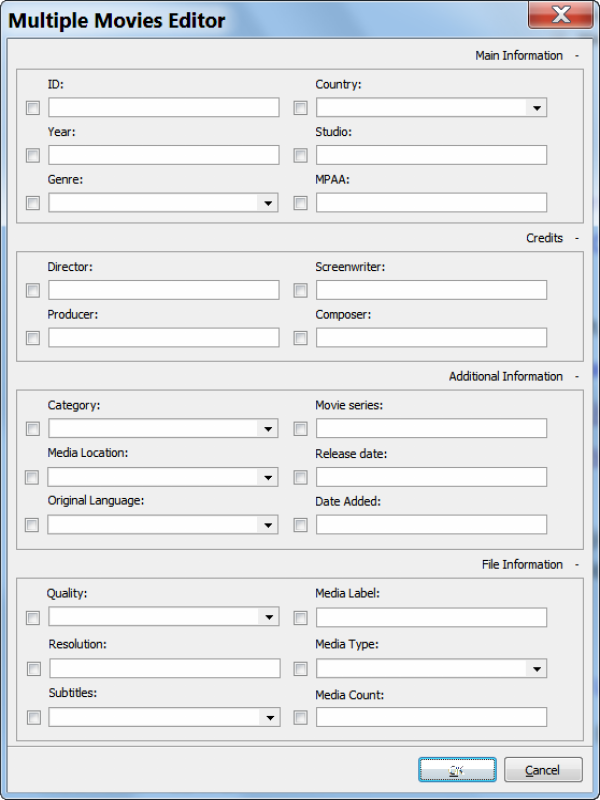
- Use the check boxes to select the fields to change. Fields not included in the dialog cannot be edited.
- Enter the new values in the edit boxes. For list fields, existing values may be selected from the drop-down list.
- When satisfied, click OK to process the changes. WARNING: All the selected records will be changed at once. There is no "undo" function.
 | | Loan, Seen, Wish and Set ID are separate commands which also work with multiple selected items. Use these commands, rather than the MME, to change Borrower, Seen/Date seen, Wish and ID. | |
- Clear clears all fields except for Title and Year. Use this if you've downloaded information for the wrong movie and need to re-run the import plugin again to get the correct data. This will ensure no incorrect data is left in fields not overwritten by the download.
- Loan/Return—see Loans Manager.
- Clicking the Seen flag in the Information Panel sets the Seen date to today. Using the menu item allows any date to be set.
- Using the menu item for Wish allows the setting of this flag for multiple movies.
- Set ID assigns an ID number according to the setting at Preferences>Movies.
- The Screenshot maker is a simple tool for creating screenshots from the video file and recording them with the movie record.
- When in Edit Mode, Add video files may be used for adding media files to the File path field. This is the same as using the folder icon to the right of the field. The path can also be entered directly into the field (e.g., by pasting from the clipboard). To add files to multiple movies, use Tools>Scan files.
- When media files are added, they are automatically read for file information. Use Re-read file information in situations where the file has been changed outside of PVD.
- Organize files by episodes is a special purpose tool for adding episode files to a movie record that has not yet been converted to a series. Add all your episode files (they must somehow be numbered) to the File path, then run this command. It will create separate episode records and attach each file to its own record.
- Open containing folder opens the folder containing the media file(s) in Windows Explorer.
- If you have any time left over after working on your collection, you may Play a movie. This launches the movie in the player associated with the file type. That file association is set in Windows, and the player used is up to you. Multiple files are wrapped in a playlist file. Set the Playlist type at Preferences>Miscellaneous, and associate that file type with your media player.
| |
Filters
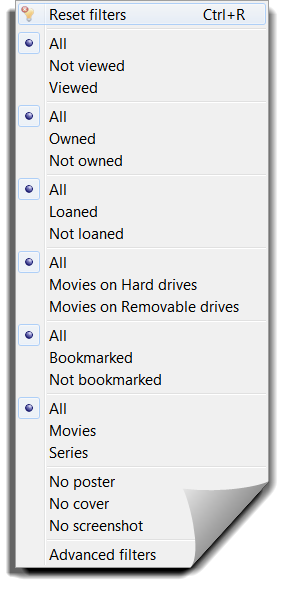
  | - Six filters are offered, each based on a specific movie attribute:
- Viewed—the Seen flag is set.
- Owned—the Wish flag is not set.
- Loaned—a borrower has been recorded using the Loans Manager feature.
- Media existing—the existence of a "movie on hard drive" is assumed according to the presence of any data in the File path field.
- Bookmarked—the Bookmark flag has been set using the Bookmarking feature.
- Movie—the record has no associated episodes, and is therefore a movie and not a series.
- Each filter has three possible states: Ignore (so the result is "All"), True or False.
- It's useful to understand filters in this way to avoid confusion over what they mean—in your collection. The wish attribute, for example, means whatever you want it to mean. It not being set does not have to imply the movie is owned. You'll probably want your database to include movies rented or seen in the theatre. Those may very well not be wished for or owned.
- If the menu captions don't make sense (as illustrated by the above point), they can be customized to suit your circumstances by using a custom language file.
- If you're not going to use the Loan manager feature, don't waste the loan filter. You could, for example, use it to hide various kinds of videos that you don't want to see listed with your "normal" movies. "Loan" these to "borrowers" named to indicate the reason for hiding the item (e.g. "boring documentary," "viewed by accident," "hard core," etc.).
 | | Forgotten filter settings are a common cause of mysteriously disappearing movies. If your List doesn't seem to include all the movies it should, Reset filters. Also, clear any active searches (simple or Advanced). If there are any, a Clear button will appear to the right of the search box on the Search bar. | |
| |
Search (Bar)
  | - Closely related to Filter is Search. A search term doesn't actually find the exact location of your search term in a movie record, but rather filters the List to include only the movies that contain the term—in the specified field.
- Select the field to be searched from the drop-down list. By default, all the title fields will be searched. Alternatively, you may search any one field, or all fields (the latter will take a while, and the results may be difficult to interpret). For more complex searches involving multiple fields, select Advanced search from the bottom of the list.
- The field list includes most, but not all, standard fields. It does not include custom fields. Any field may be searched using Advanced search.
- Search operates "as-you-type" in the search box. It therefore provides a convenient way to jump to a particular movie in a long list. Not only that, but the search box is the default location for keyboard input, so you don't even have to select the search box before you start typing.
- If any search is active (simple or advanced), a Clear button will appear to the right of the search box. Click this to clear the search and restore the list.
 | | You may have difficulty remembering the exact words in, or proper spelling of a title—perhaps because it is in a foreign language and/or it includes characters you're not used to typing. If so, include any term you will remember in the Also known as field. Then you will always find Le fabuleux destin d'Amélie Poulain before you can finish typing "amelie."  | |
|
View
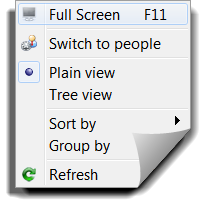
| - Group the list by selecting a field to Group by from the list. Nested groups may be specified at Preferences>Movies|People>Tree view nodes. Apply these settings to the List by selecting Tree view. Remove them (or a simple grouping) by selecting Plain View.
- Sort the list by selecting a Sort by field from the list. To reverse the sort order, select the same field again.
- The List and Information Panel usually, but not always, refresh automatically. If you don't see what you think you should be seeing, Refresh.
| |
[attachment deleted by admin]
|







 Commands - Part 1


Reserved